This article is part of a blog series where I explain common Azure vulnerabilities, how to create a lab such that it reproduces the issues, and how to exploit it. To follow this tutorial, you’ll need an Azure account and Azure CLI tool installed on your machine both of which you can get for free.
- You can can create an account for free at https://azure.microsoft.com/
- You can install Azure CLI from https://docs.microsoft.com/en-us/cli/azure/install-azure-cli
- You can find the source code of the challenges at https://github.com/andrei8055/Azure-security-challenges
- Consider getting Azure certified? Check my article on how to get Certified Azure Red Team Proffessional
- Part #1: Create an Azure Vulnerable Lab: Part #1 – Anonymous Blob Access
- Part #2: Create an Azure Vulnerable Lab: Part #2 – Environment Variables
- Part #4: Create an Azure Vulnerable Lab: Part #4 – Managed Identities
- Part #5: Create an Azure Vulnerable Lab: Part #5 – Cloud Init
- Part #6: Create an Azure Vulnerable Lab: Part #6 – AAD Enumeration and Password Spraying
1. Soft Deleted Blobs
In the first two parts of this series we have seen how improper permissions set to a Storage Account Container can expose sensitive data for anonymous access. Than we have seen the risks of vulnerable web applications, specifically accessing Environment Variables through the use of command injection in a submit form page.
In this tutorial we will see how data that has been deleted from a private Storage Account Container can still be a risk in some cases. Even if we know the full path of resources uploaded to a private container, Azure requires authentication to be accessed. To provide access we can choose between:
- A shared access signature (SAS) – is a URI that grants restricted access to an Azure Storage container. Use it when you want to grant access to storage account resources for a specific time range without sharing your storage account key.
- A connection string includes the authorization information required for your application to access data in an Azure Storage account at runtime using Shared Key authorization.
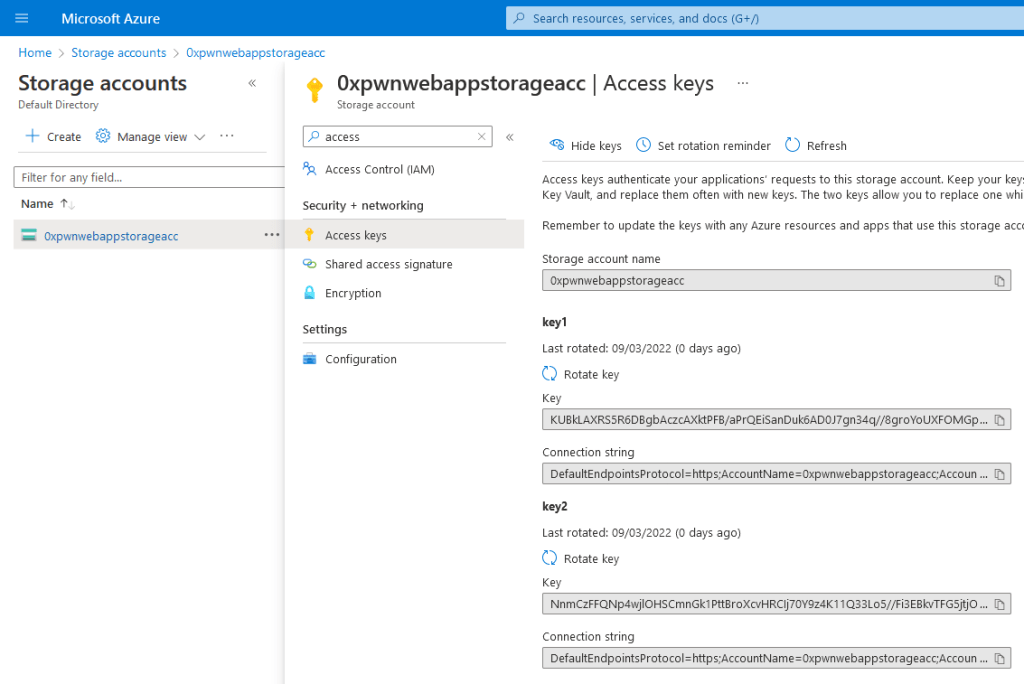
For the sake of this tutorial, we will pretend to be a developer that will use the connection string and save that in a config file/source code deployed to Azure. We can find the connection string of a Storage Account in the Azure portal as shown below:
Now, the problem here is that we are giving access to the whole storage account by passing the connection string into the web app. Azure supports granular access for specific containers, for a limited amount of time, or event for a specific file within the container! But for convenience (or lack of knowledge), a developer might deploy the connection string for the entire storage account. Don’t be that developer.
The second part of this tutorial is about recovering deleted blobs. By default, when creating a storage container using the Portal, the Soft Deletion is enabled with 7 days retention time. Now image that you got access to a storage account with tens of containers, and someone at some point mistakenly uploaded an SSH key to one of these containers and than deleted it without being aware of the 7 day retention day “feature”.

2. Creating a private Storage Account Container
The process is very similar to the one in the first tutorial, so I’ll cover the main differences: after we created the resource group and the storage account, this time we will create a private container using the --public-access "off" flag:
az storage container create --name $containerName --public-access "off" --account-name $webappStorageAccName
As opposed to the Portal, the azcli does not enable the soft delete by default. To replicate the Portal configuration, we will have to explicitly mention that using the --enable-delete-retention true --delete-retention-days 7 flags:
az storage account blob-service-properties update --account-name $webappStorageAccName --resource-group $resourceGroupName --enable-delete-retention true --delete-retention-days 7
Finally let’s upload some files to the container:
    az storage blob upload --container-name $containerName --account-name $webappStorageAccName --file ".\resources\1.png" --name "1.png"
    az storage blob upload --container-name $containerName --account-name $webappStorageAccName --file ".\resources\2.png" --name "2.png"
    az storage blob upload --container-name $containerName --account-name $webappStorageAccName --file ".\resources\3.png" --name "3.png"
    az storage blob upload --container-name $containerName --account-name $webappStorageAccName --file ".\resources\flag.txt" --name "flag.txt"
Ooops! The flag.txt should not be there, I’ll delete it quickly I bet noone will notice 😉
az storage blob delete --container-name $containerName --account-name $webappStorageAccName --name "flag.txt"
3. Connecting the web application to the Container
Now that the container is all setup, we need to get the connection string for the container:
$ConnString = az storage account show-connection-string -g $resourceGroupName -n $webappStorageAccName --query "connectionString" -o tsv
Than we will replace the placeholders in the application’s source code with the actual connection strings. This is done for the sake of the lab such that we don’t have to manually edit the source code everytime we want to re-create the challenge with the new connection string:
    Copy-Item .\config\app.py.bak -Destination .\webapp\app.py
    ((Get-Content -path .\webapp\app.py -Raw) -replace 'AZURE_CTF_CONNECTION_STRING', $ConnString) | Set-Content -Path .\webapp\app.py
    ((Get-Content -path .\webapp\app.py -Raw) -replace 'AZURE_CTF_CONTAINER_NAME', 'images') | Set-Content -Path .\webapp\app.py
Once this is done, we deploy the application to Azure, and whitelist our IP address to access it.
4. Exploiting Soft Deleted Blobs
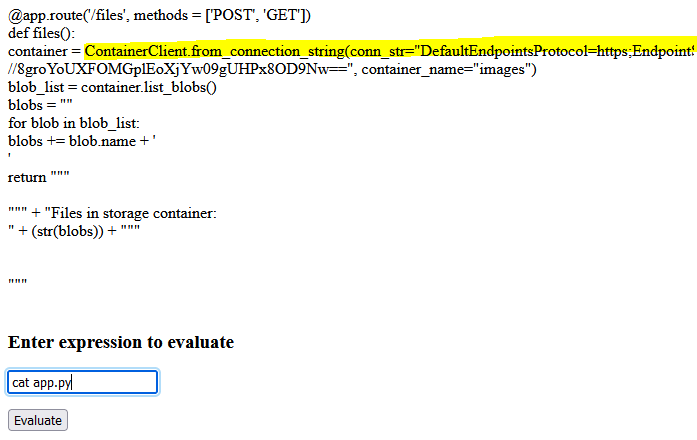
Now, to exploit this vulnerability we navigate to the already known vulnerable web application and start poking around. Listing the files in the current directory, we can find among other the source code in the app.py:

Listing the contents of this file, we can see there is a connection string stored inside (our placeholder has been replaced at runtime with the actual value of the container):
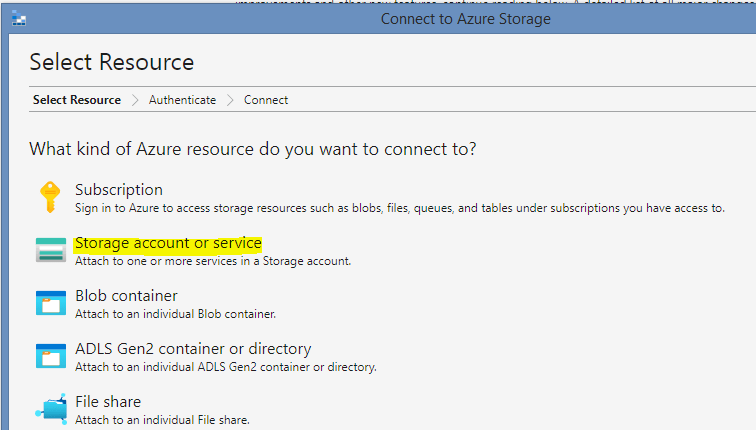
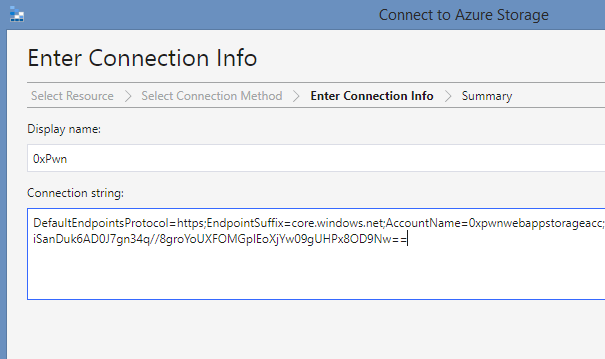
And that we want to use a Connection String

And we paste the value of the conn_str variable that we found in the source code, and connect:
On the left side menu, a new storage account should show up. Navigate to the Blob Containers -> images and open it:
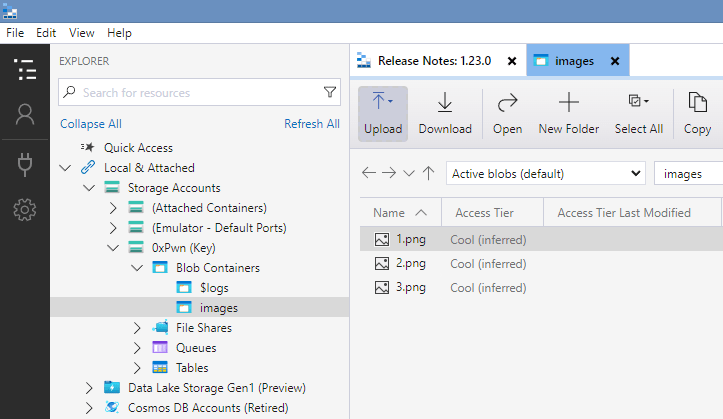
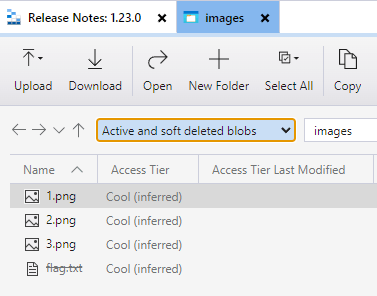
At first glance, it seems that nothing of interest is stored here. Remember the flag that we accidentally uploaded? Change the view to Active and soft deleted blobs:
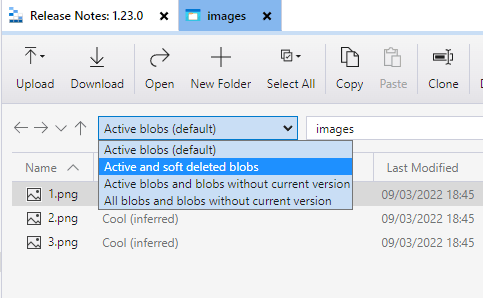
And voila! Right click -> Undelete